iOS app hacking - JailBreak your iPhone!

This article will give you a kick start into the world of iOS mobile App hacking with jailbreaking your iPhone!
Published on October 29, 2021 by Florian Wagner
mobile hacking app hacking iOS
9 min READ
Like my introduction article said, the following will get you started with hacking iOS Apps. First things first, to get started you will need something to install and test your app of choice. While on Android there are emulators that are emulating CPU instruction sets very well and allow an almost native experience in comparison to a real Android device this is different on iOS. The only company I am aware of that is offering a remote connection to an iOS virtual device is Corellium. I personally have not tried their services that is why I can´t tell you if their virtual iOS experience has any downfalls in terms of security tests. I could imagine that a virtual iOS environment can be very interesting and useful for security automation.
My recommendation is to start by using a real iOS device.
Due to the long support of devices by Apple it is very easy to get your hands on a test device. For this, I would recommend you to buy a used iPhone between iPhone 6s to iPhone X or the iPad equivalent with an installed software version in between iOS 12.0 to 14.7.1. Maybe you even hoard your old iPhone somewhere - then get it out now!
Why these recommendations?
- iPhones and iPads are easy and cheap to get online, especially used (you get the iPhone 6s from 30-100 bucks).
- The easiest and most reliable jailbreak currently available works on them (see checkra1n).
- You do something good for the environment in reusing an old device and giving it a new purpose. ;-)
- With a buyers/sellers contract you can even take used devices off your taxes (e.g. for an educational purpose).
While checkra1n has many advantages for security researchers and penetration testers it is NOT recommended to install any jailbreak on your primary device. Jailbreaking your device will remove main security restrictions by Apple and makes hacking your device much easier. Checkra1n undermines the trust of the iOS secure boot chain and will allow attackers to gain easy access and privilege escallation on your device. My suggestion for all of you who wonder how they can protect themselves is, if you can afford it, get an iOS Device with an A12 CPU or higher. As another countermeasure restart your device every time after you have left it unattended.
checkra1n, a remarkable jailbreak
The jailbreak we will use to break free our iDevice of choice is checkra1n. Like mentioned, checkra1n is one of the easiest and most reliable jailbreaks ever released. Its base is a bug found within the Boot ROM (aka SecureROM), the first code that is running when starting up an iOS device. Because of this, and the fact that the Boot ROM is designed to be read only, Apple is and will never be able to patch this bug within the vulnerable devices.
On top of this checkra1n is a semi-tethered jailbreak which means that it only persists until the next reboot of the device which makes it easy to remove but also annoying when you have to reboot your device.
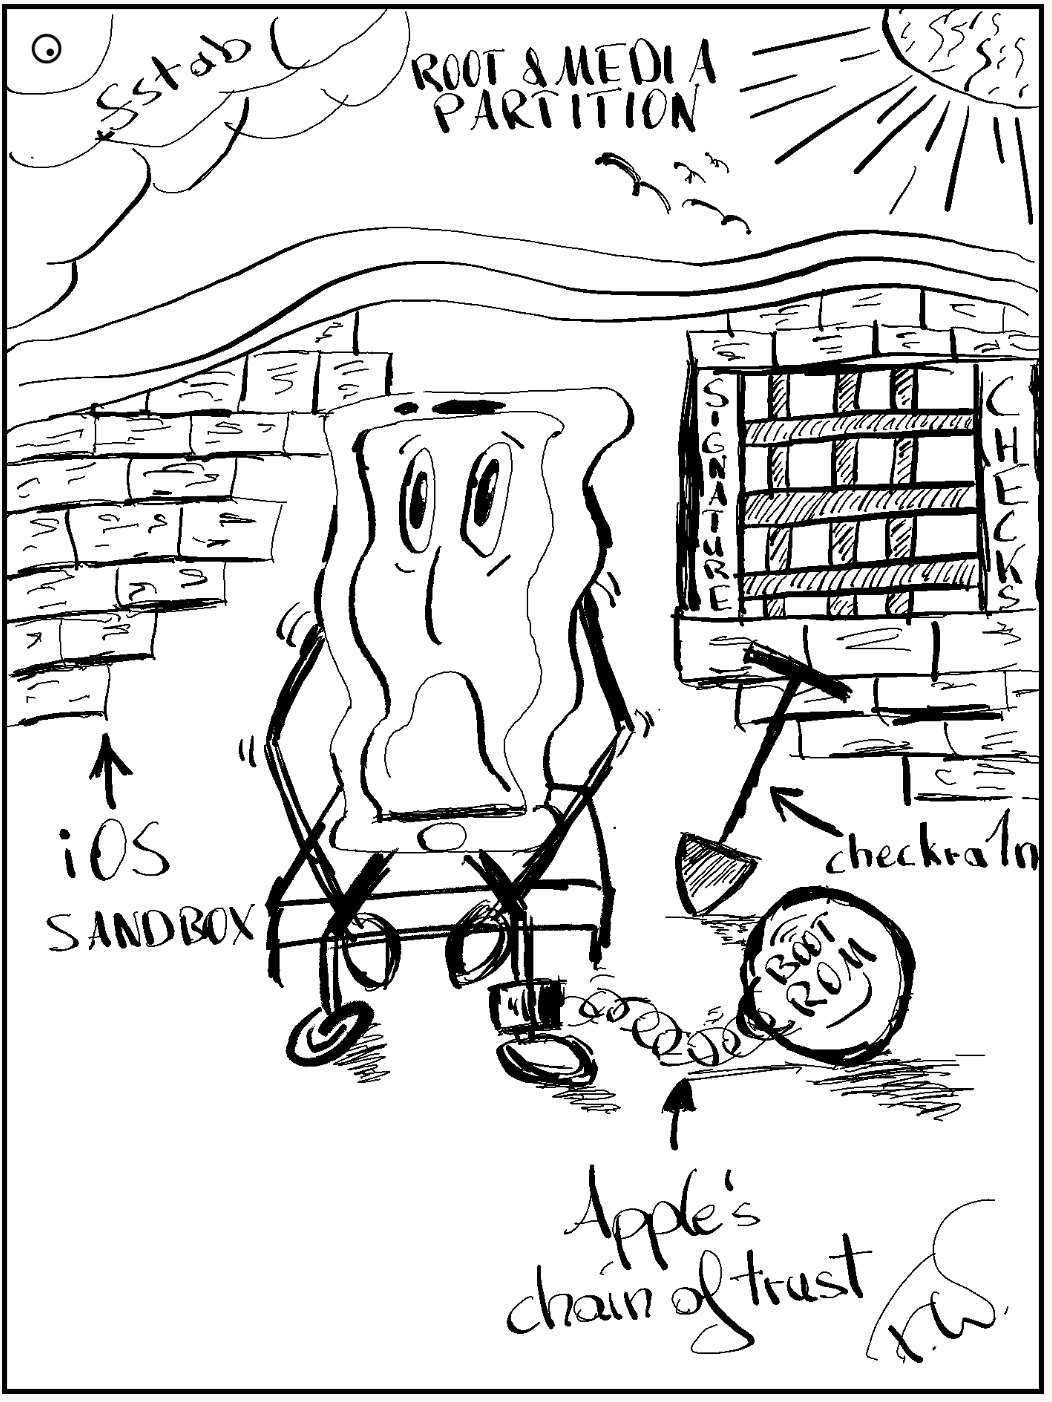
“News report: iPhone Jailbreak” illustrated by Florian Wagner - CC BY-NC-ND 4.0 27/10/21
Requirements to use the checkra1n jailbreak
To jailbreak your iOS device you will need a notebook or desktop PC with Linux or macOS ready to go. MS Windows is currently not supported by the checkra1n authors. I would recommend you either try to execute the script with the Windows Subsystem for Linux (I have never tested this) or to create a bootable usb stick with e.g. Ubuntu and execute checkra1n from the live system. Due to the handling of USB devices in virtual machines, jailbreaking your iDevice will not work out of a Linux/macOS virtual machine. On native macOS you will not have any problem to follow my instructions. On Linux you have to download the bash script and run it within the CLI (don`t forget to give it execution permissions ;-). For an easier follow along I have listed the steps to jailbreak your iPhone/iPad below. What I show you has been successfully tested on my Macbook with macOS Monterey 12.0.1 and my iPhone 6s with iOS 14.7.1 installed.
Hints and disclaimer:
- You will need an original Apple cable (USB-A on one side and Lightning on the other) to directly connect your iPhone/iPad to your computer (USB-C on one and Ligtning on the other did not work for me).
- Notice that this will not work with any kind of third party docking station (mac adapters might work).
- If you do this with an iPhone 8s up to the iPhone X you have to activate the “Skip A11 BPR check” before starting the Jailbreak process (open the checkra1n app –> Options –> activate “Skip A11 BPR check”).
- Make sure that your phone has enough charge before you try this - 50% should be enough.
- Prior execution of the steps below make sure that you deactivate the pin/passcode/touchID/FaceID login.
- Again, please do not use your iDevice with personal data for this. Jailbreaking your iDevice removes important security restrictions!
- Checkra1n is a semi-tethered jailbreak variant which means that it will last until the device restarts.
- Take note that jailbreaking your iOS device with this method can be reversed but that I will not take any responsibility for any damage to your devices that might occure. Do your research aside from this article and make sure that you understand what you do before taking any action.
- All techniques provided in my articles are solely meant for ethical hacking, educational purposes or personal use.
- Please be aware that a failure while jailbreaking your device can damage your device permanently and irreversably!
Jailbreaking iOS 12.0-14.7.1 with checkra1n
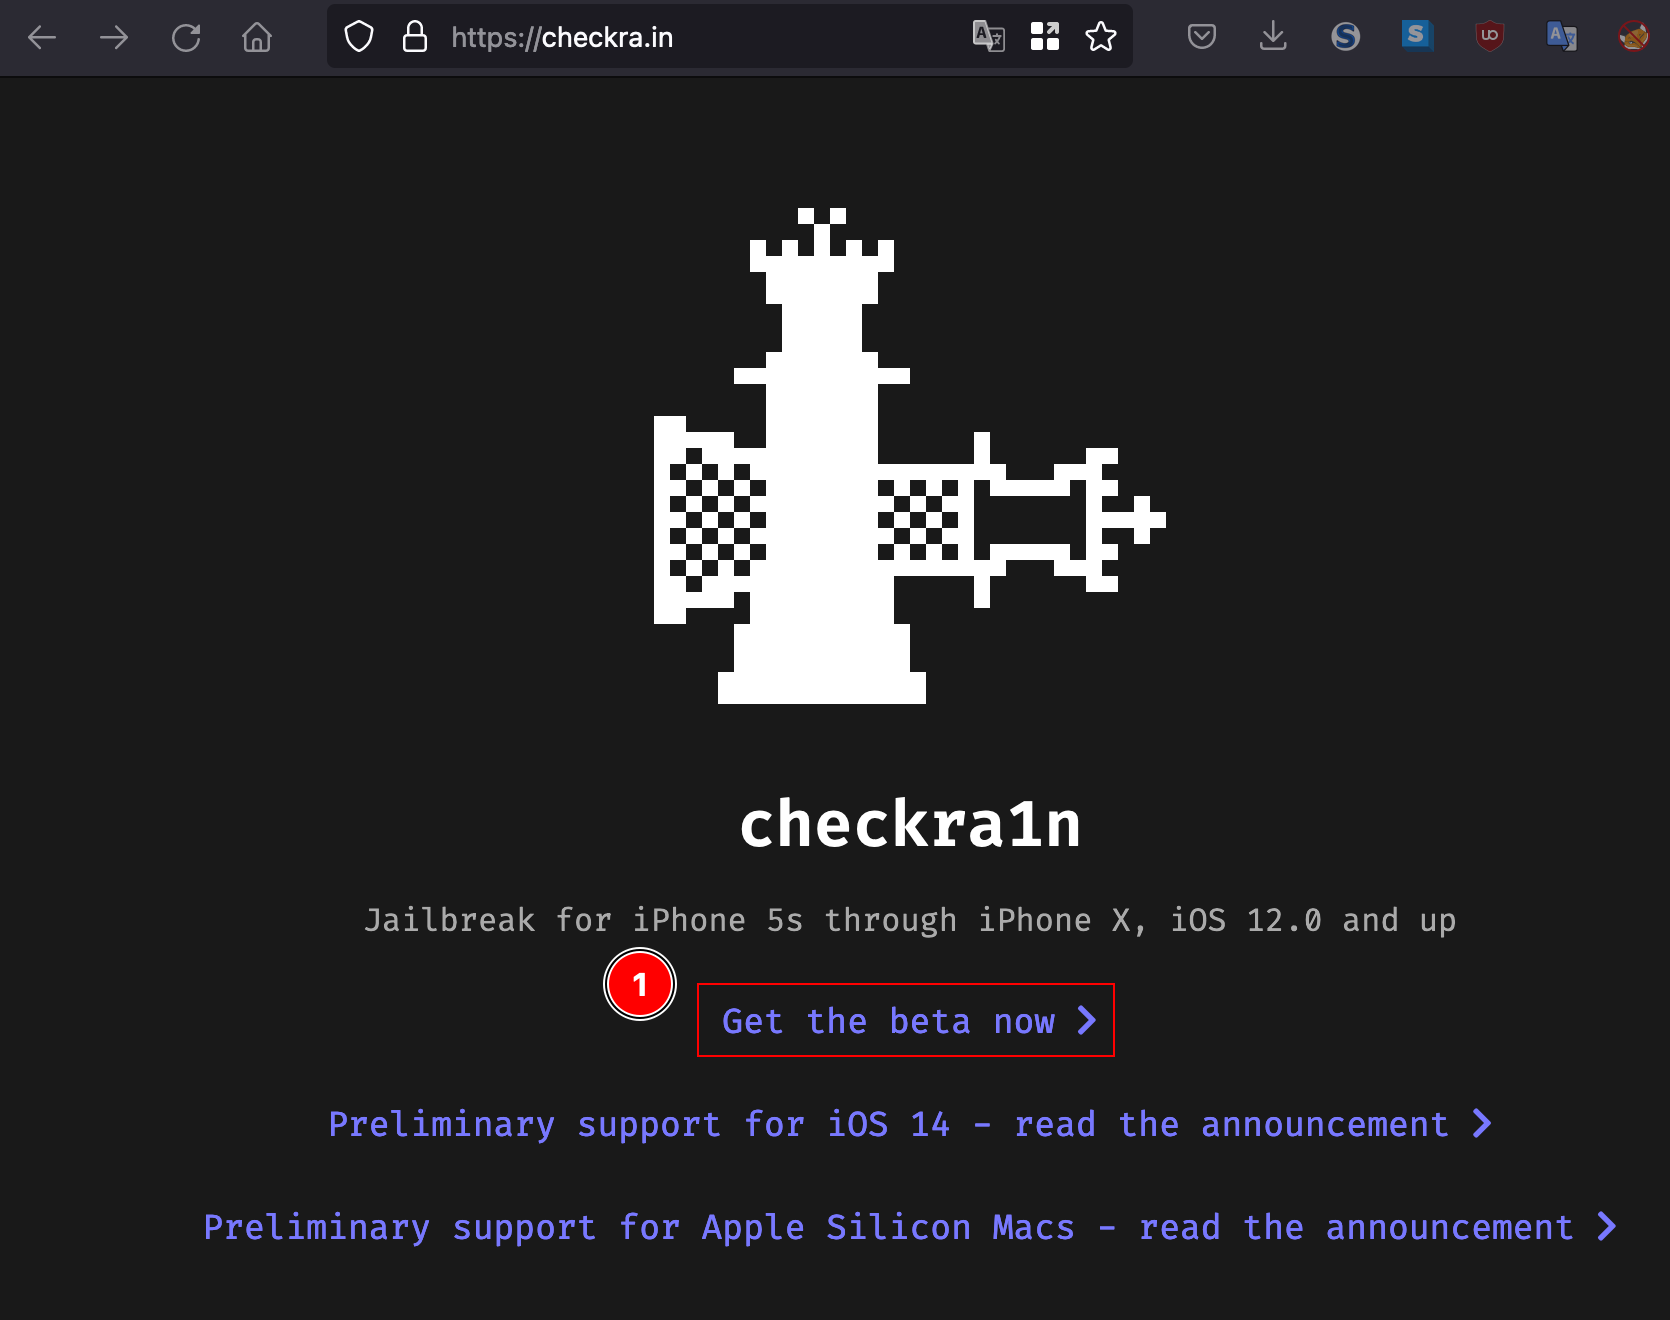
Step 1: Download the latest version of checkra1n from the offical website: https://checkra.in –> “Get the beta now” - make a selection for the installer based on your environment. Normally it will detect your environment automatically.
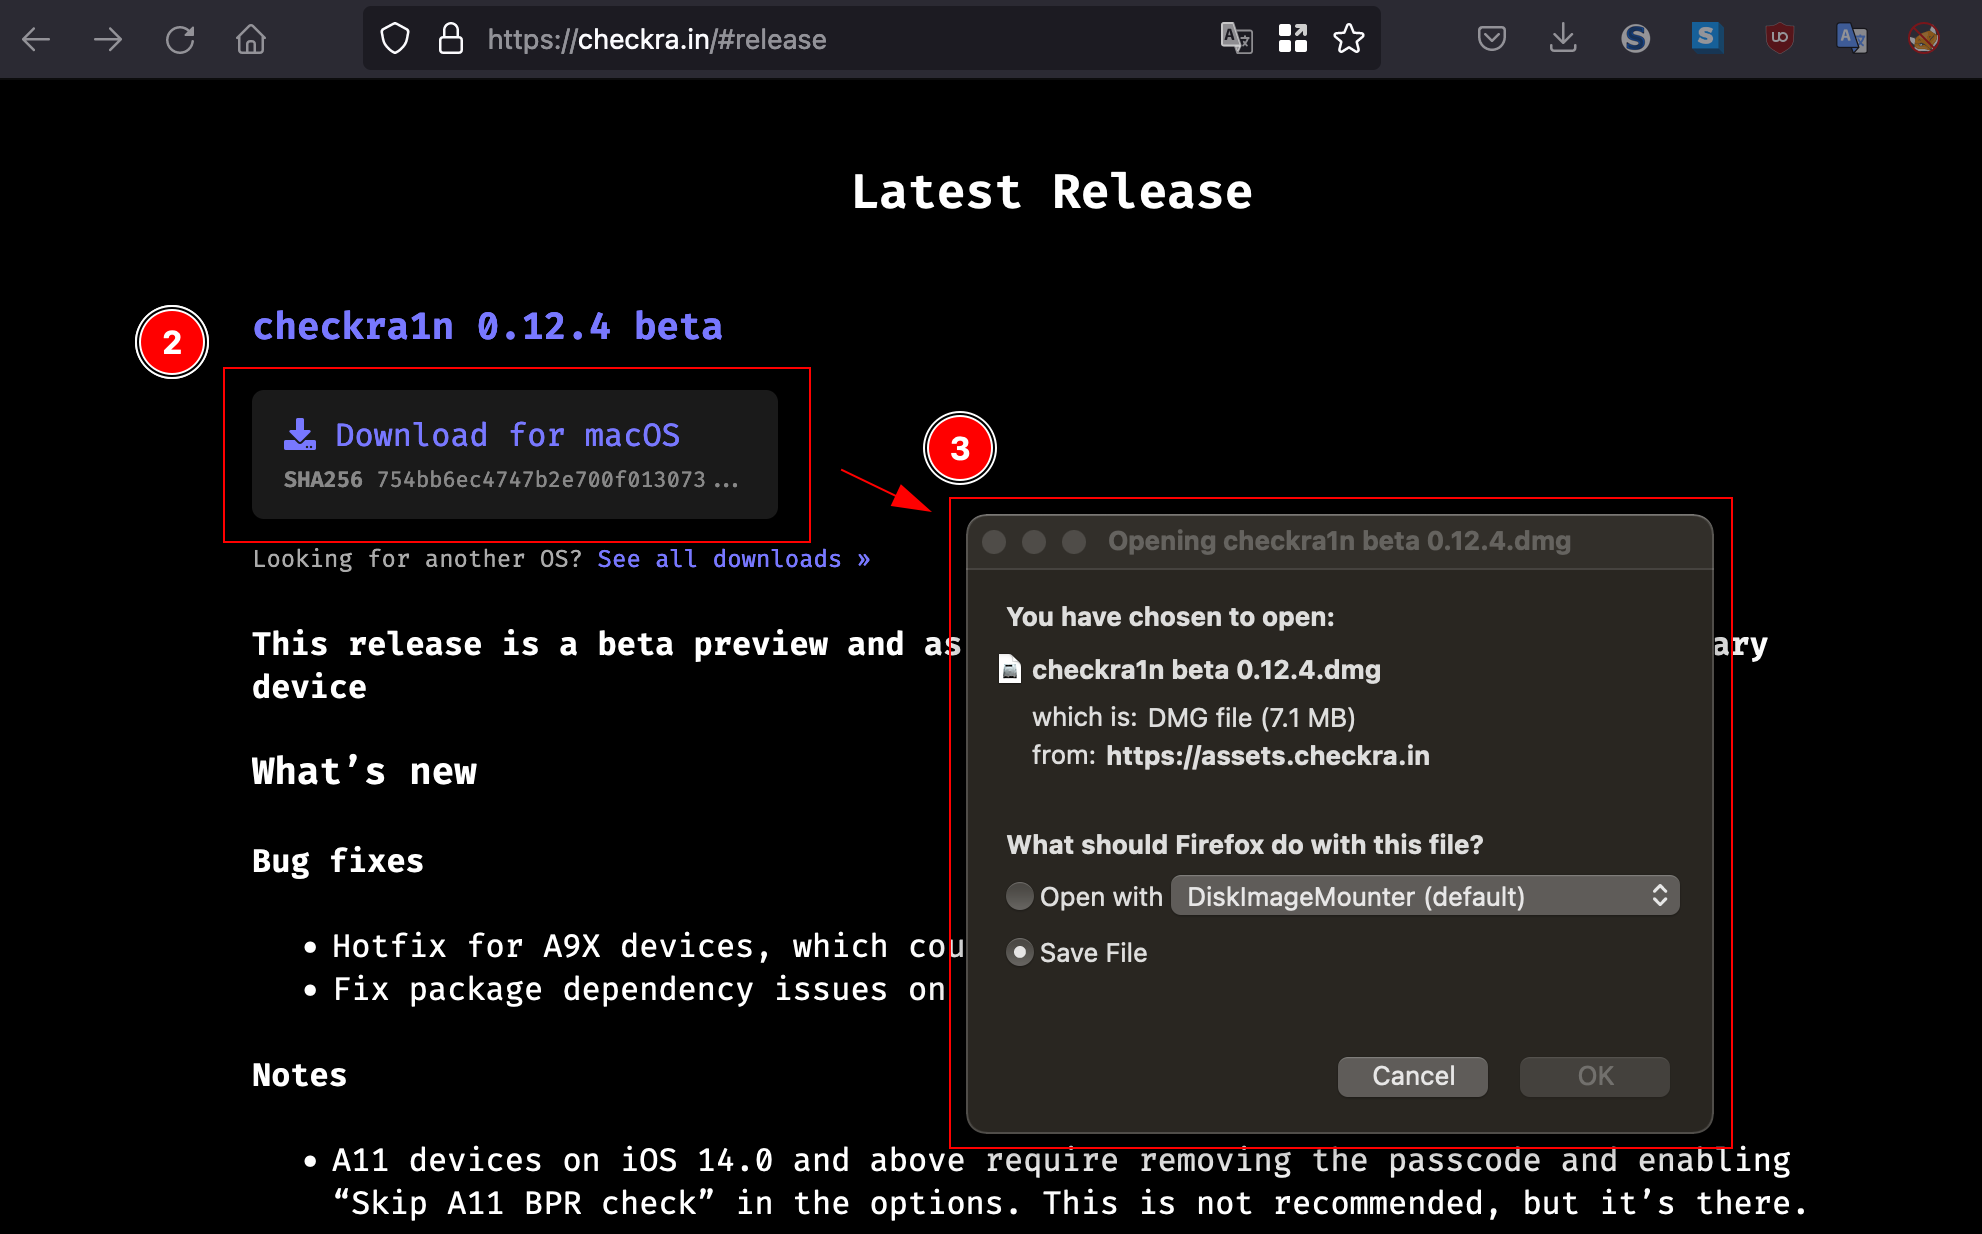
Step 2: Click on “Download for macOS”, optionally check the downloaded installer against malware with your antivirus of choise (if at all only “MacOS:Jailbreak-BI” should pop up, which is ok) and check the integrity by comparing the provided SHA256 hash.
Step 3: Save the installer locally.
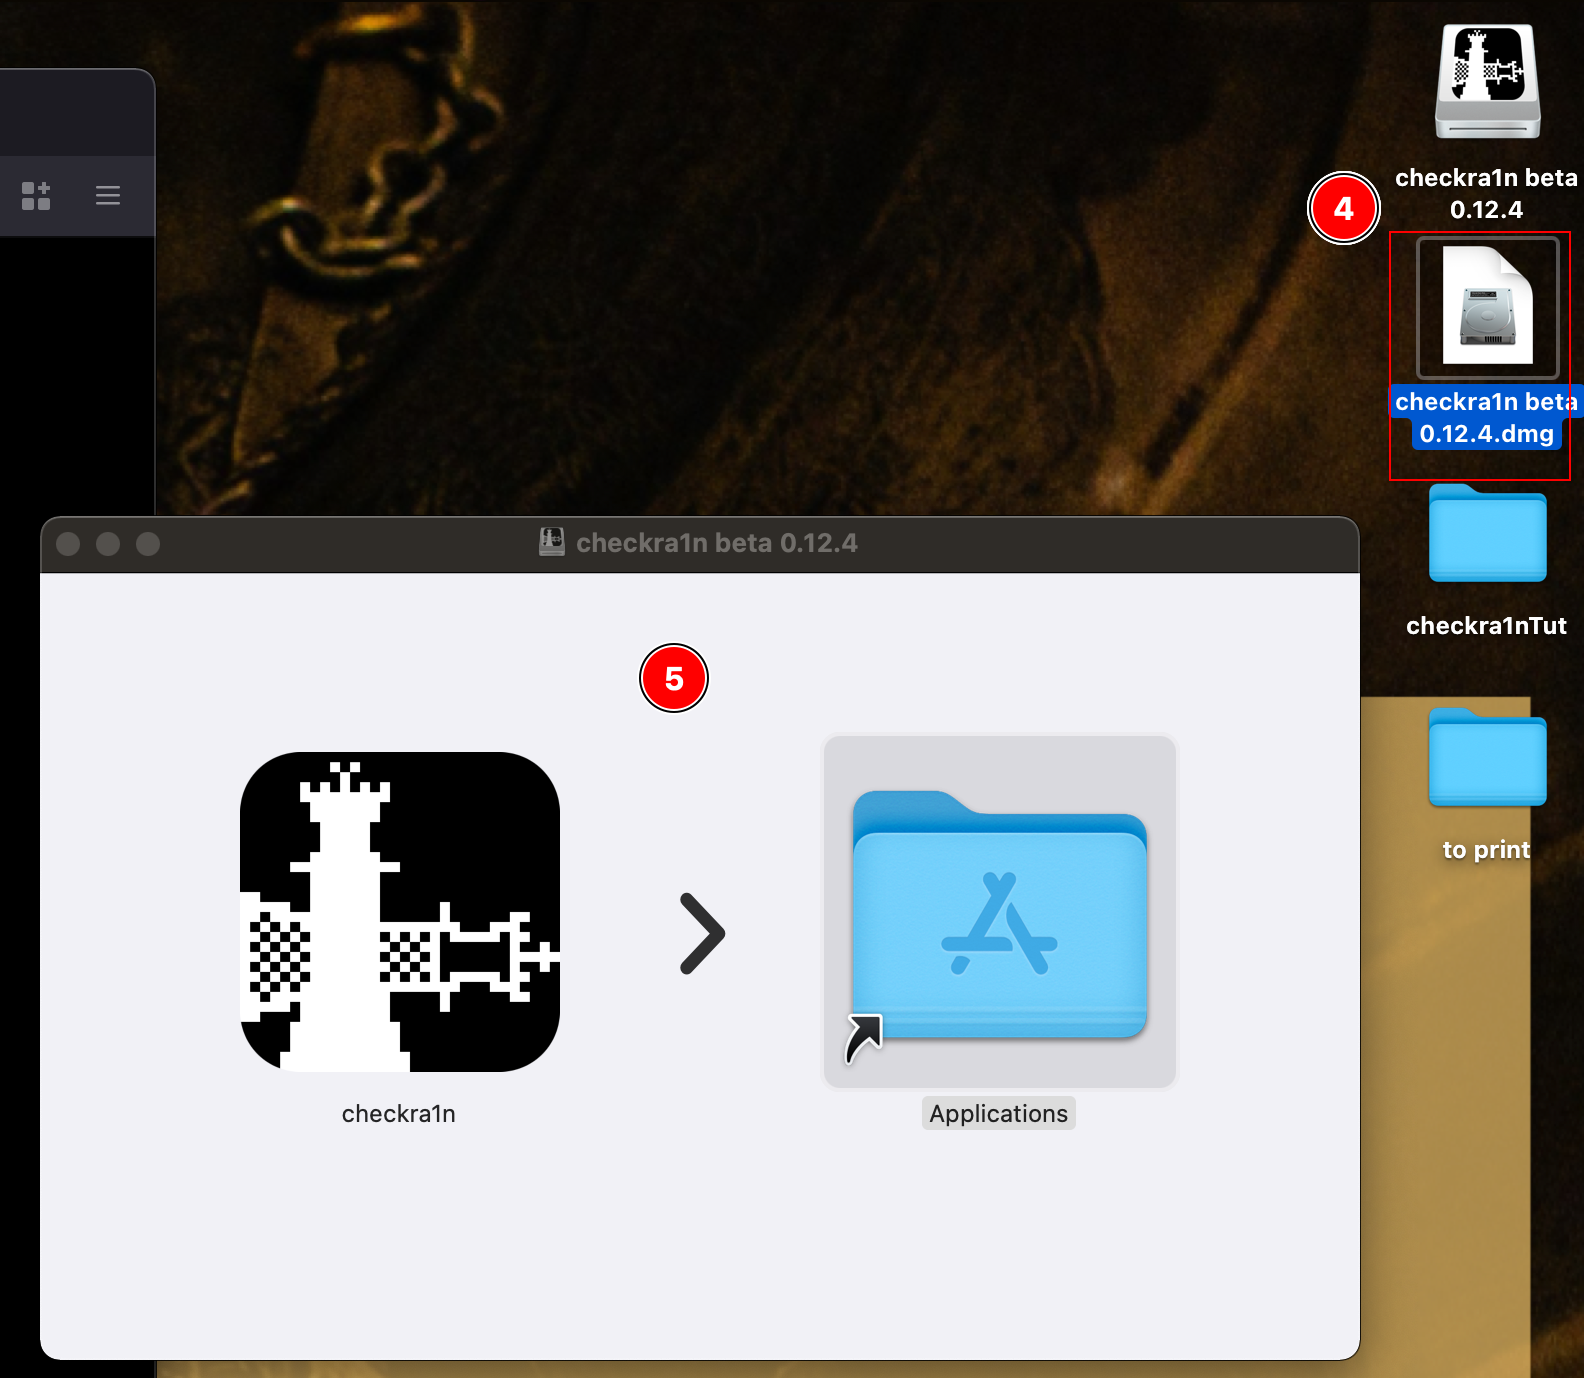
Step 4: Install checkra1n on macOS by opening it from your desktop.
Step 5: Drag the application into the “Applications” folder.
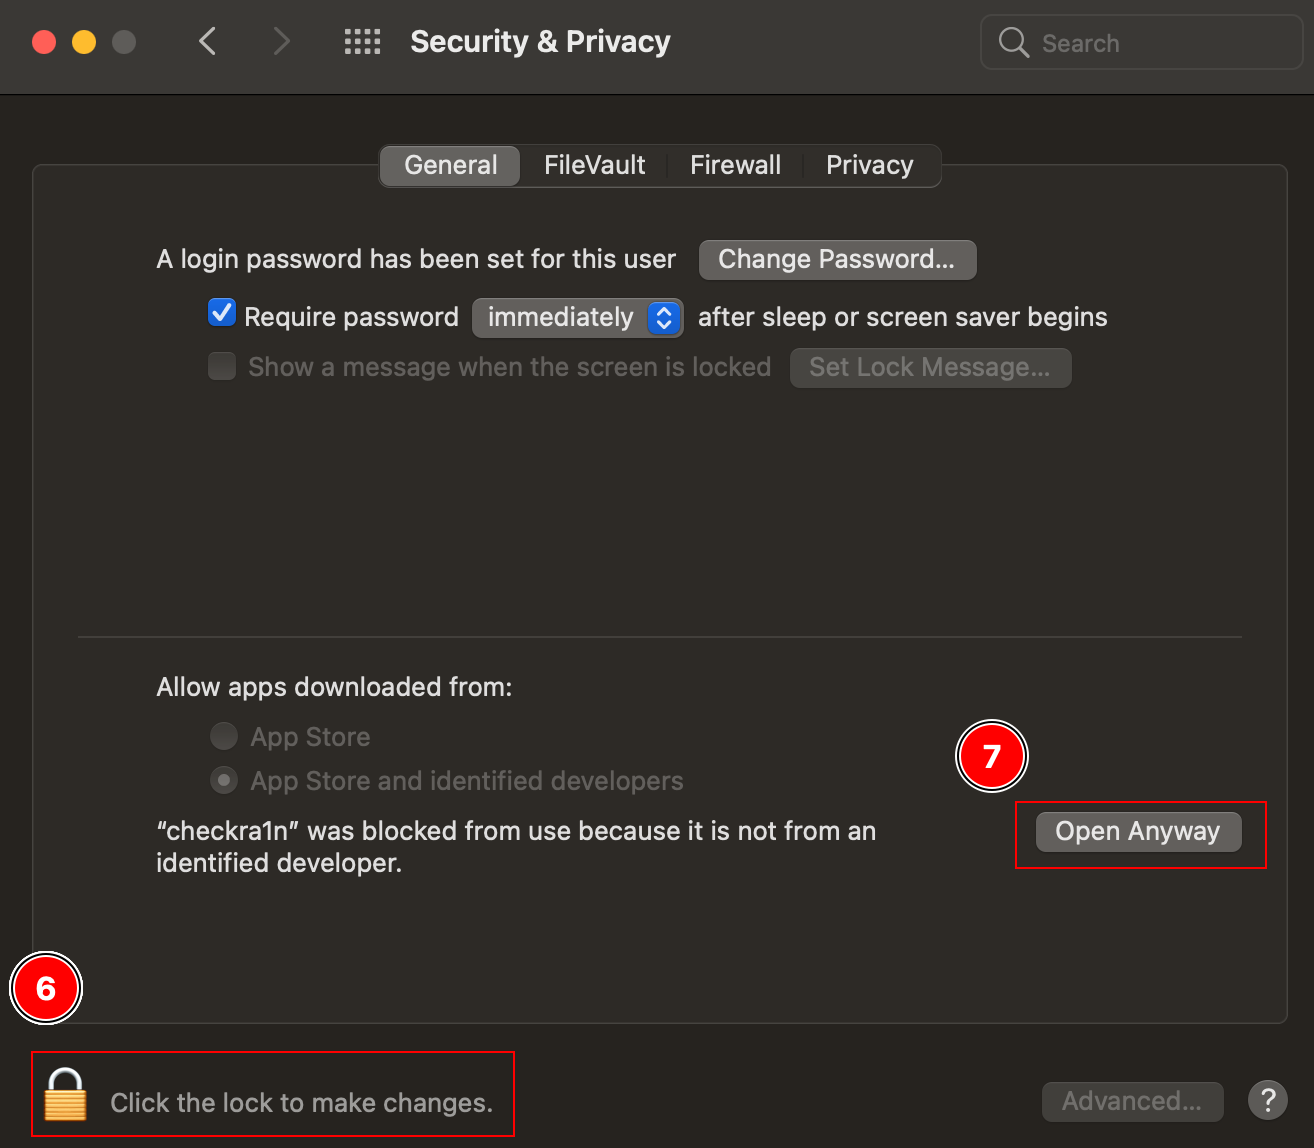
Step 6: Open your macOS “System Preferences”, go to “Security & Privacy” and click on “Click the lock to make changes.”. Enter your password and proceed.
Step 7: Now click on “Open Anyway” to allow the execution of “checkra1n” even though the developer could not be identified by Apple.
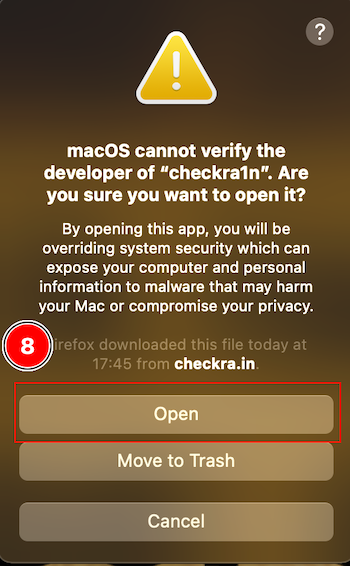
Step 8: Confirm your choice by clicking on “Open”.
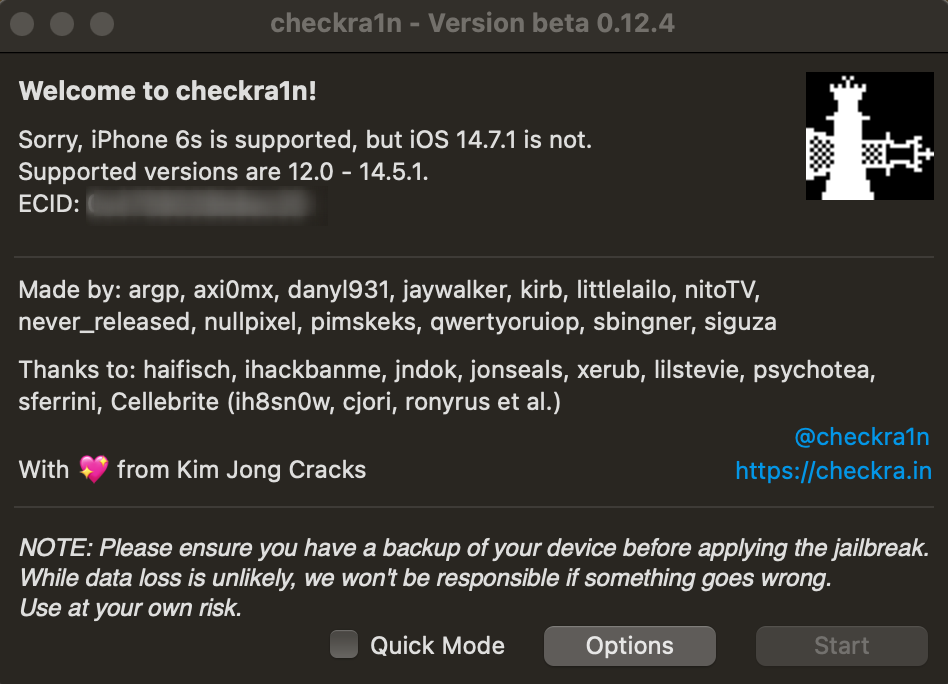
Step 9: With your iPhone connected over USB you will now be presented with the start screen of checkra1n.
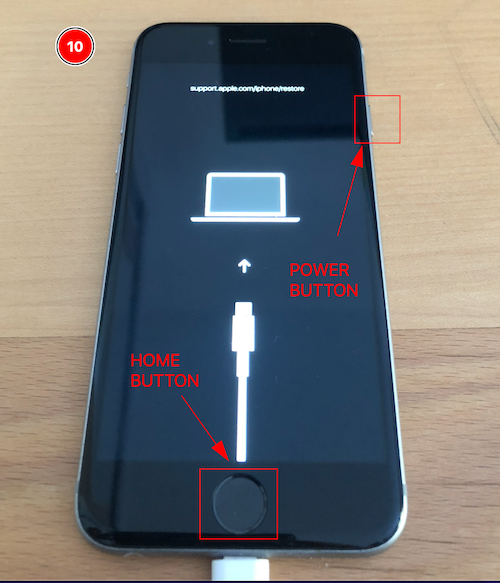
Step 10: OPTIONAL - Get your iPhone ready by starting it into DFU mode. On iPhone 6s you have to press and hold the power button + home button until you are in DFU mode.
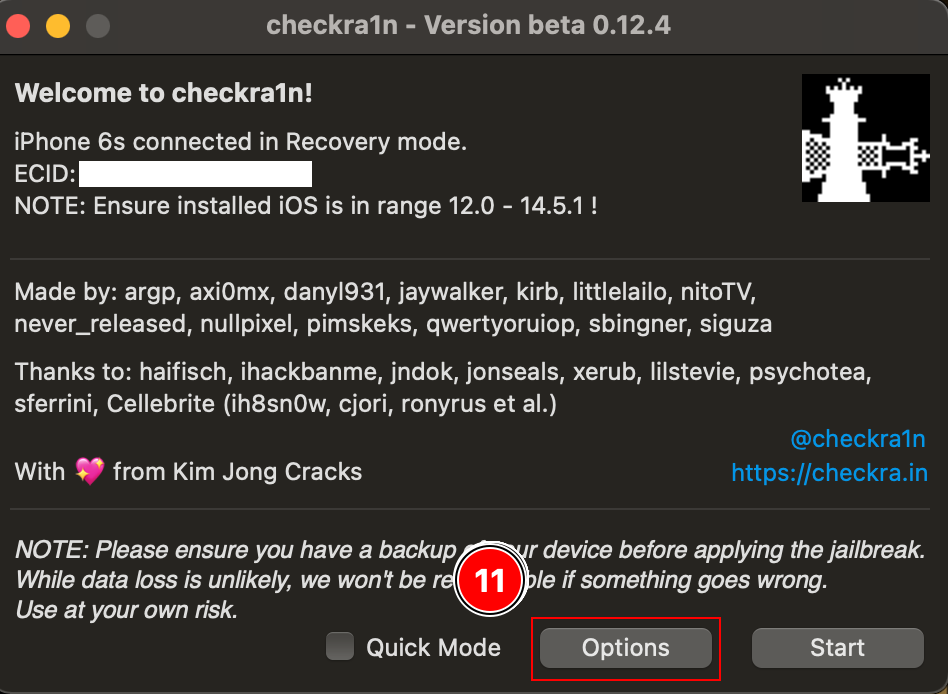
Step 11: Next start the app and click on “Options”.
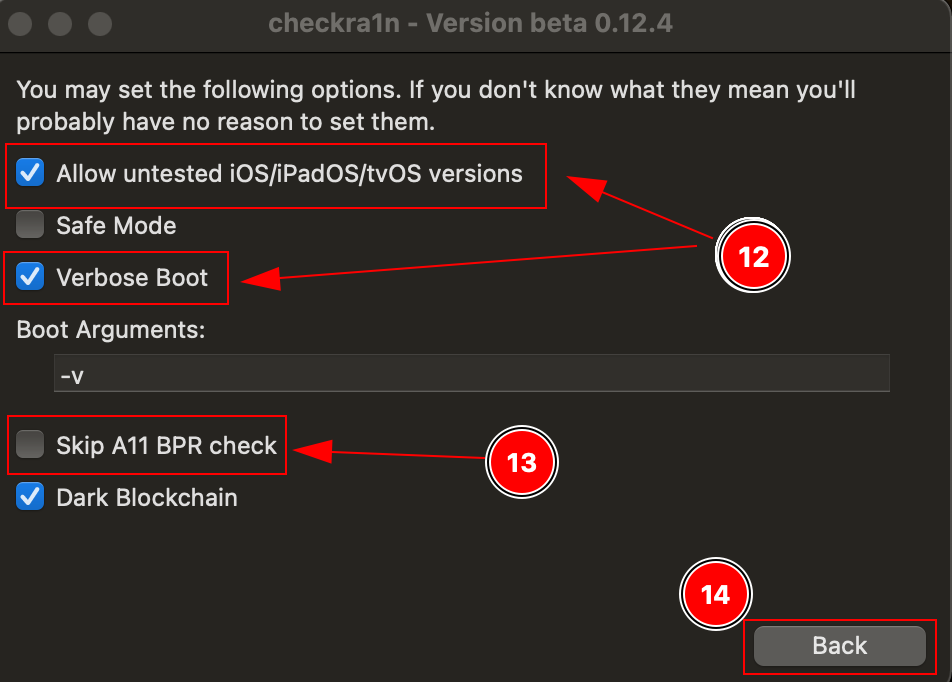
Step 12: If you have your device already updated to iOS 14.7.1 (and if something is not working) select the first option. Activate the verbose mode to see a wall of text while checkra1n gets executed (more or less only because it looks neat :-)
Step 13: For all of you who are doing this with an iPhone 8s up to X, you have to select this option too.
Step 14: After everything is selected, click on “Back”.
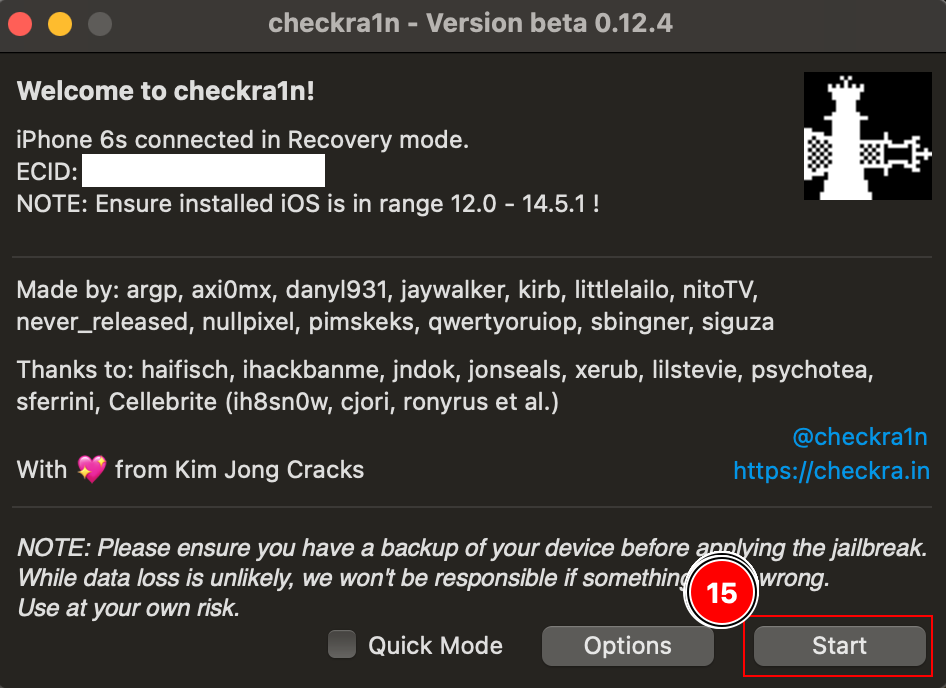
Step 15: You can now click on “Start” to start checkra1n and the exploitation.
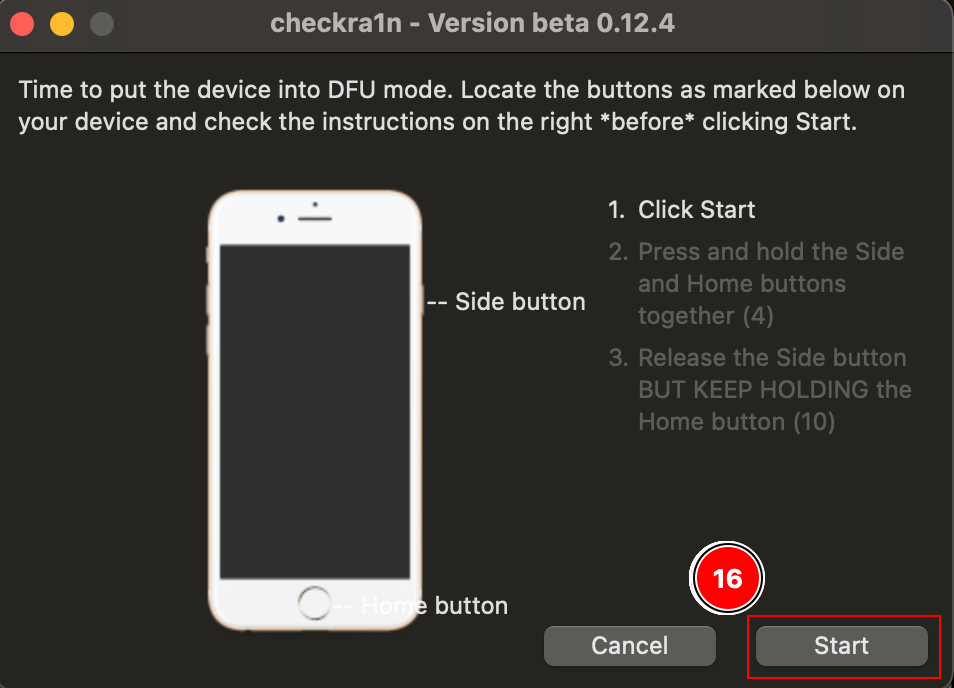
Step 16: Read the instructions displayed and follow them for your device to go into DFU (if not happend already) and execute the checkra1n payload. I have set mine already into DFU mode because I have made experience that his is working better.
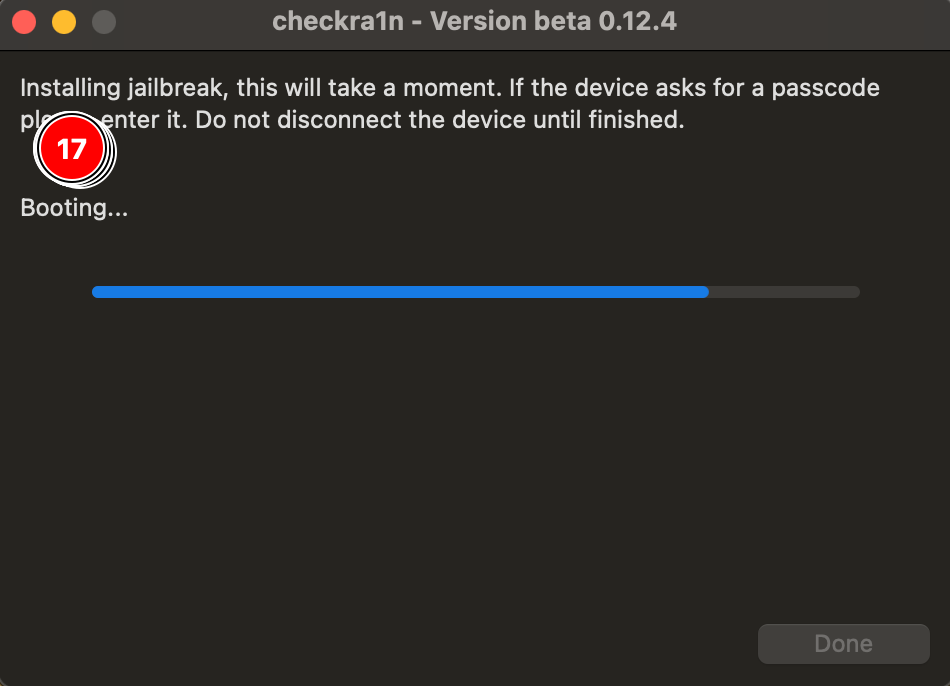
Step 17: After you have executed the steps successfully it should look like this. Your device should now boot up with a wall of text, indicating the execution of checkra1n.
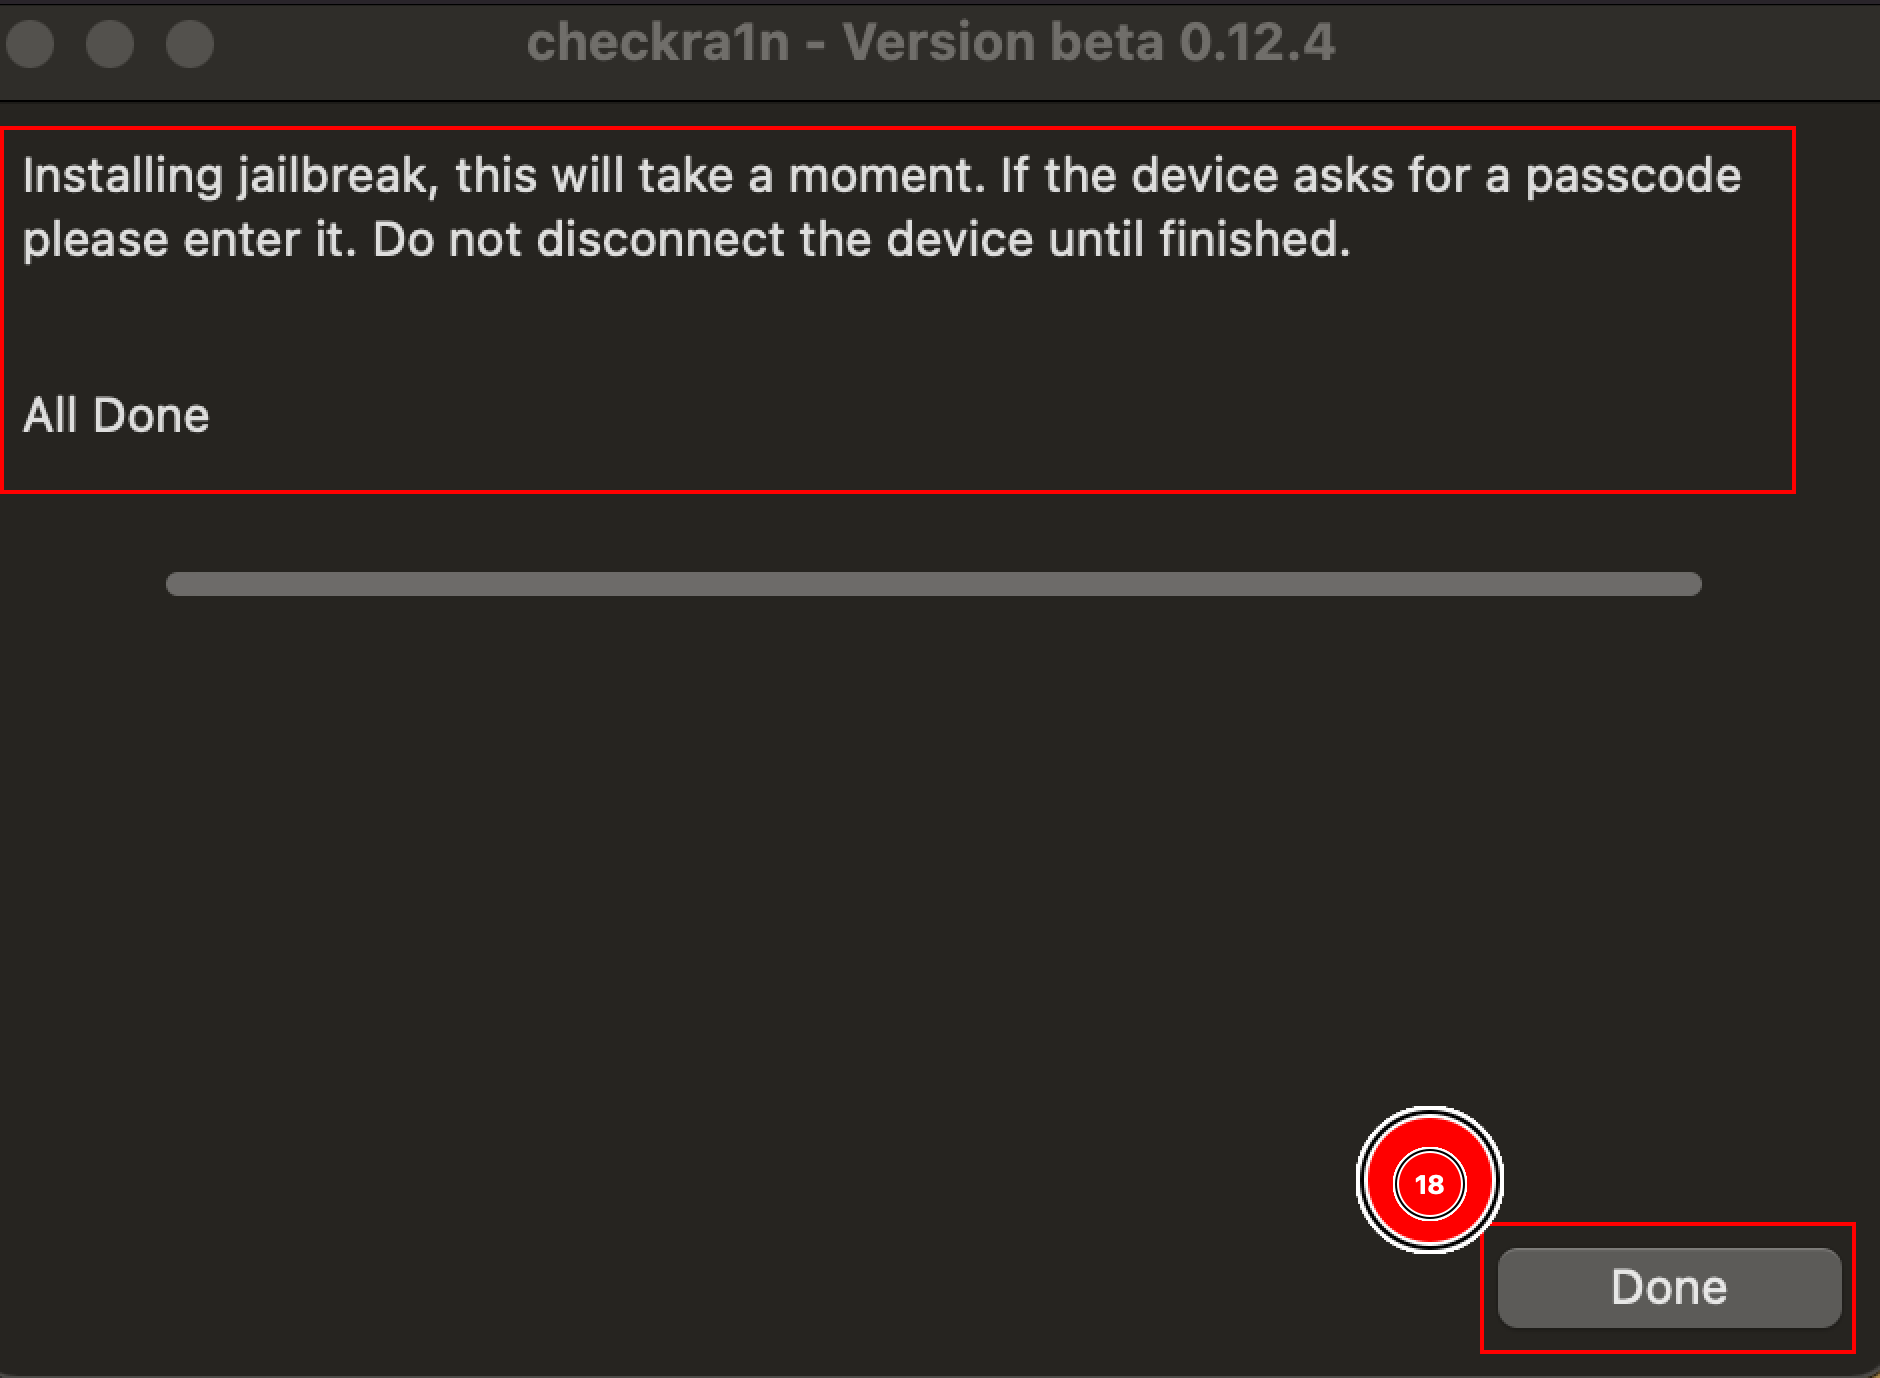
Step 18: Finally, you get a message that everything is done and you can click on “Done” to close the window.
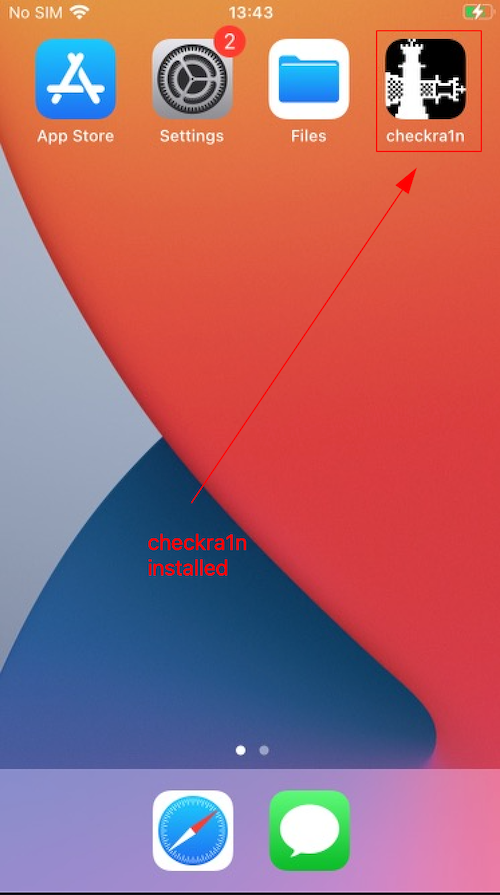
Step 19: On your phone you should now see an app installed with the name “checkra1n” - this can take a couple seconds after the first start, just wait a while and then search your apps.
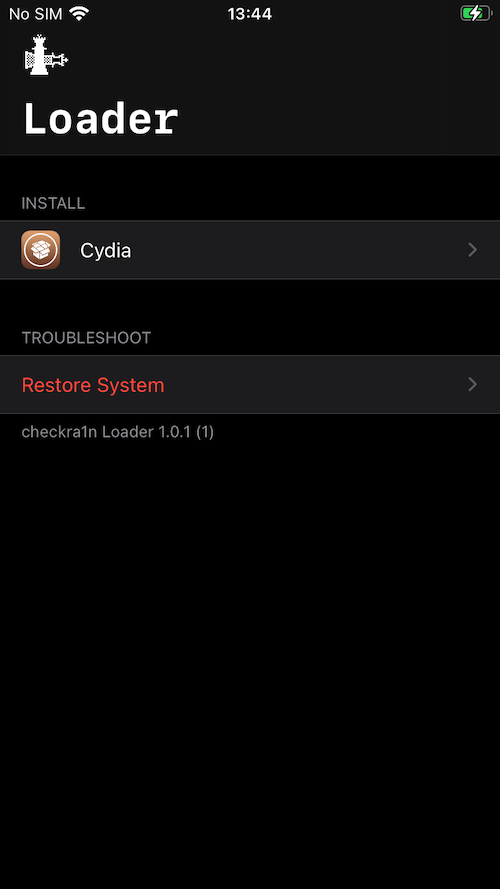
Step 20: Open your newly installed checkra1n app. This verifies a successful installation. You can now proceed and install the Cydia store to download applications like OpenSSH, UNIX tools, SSLKillSwitch etc.
Congratulations on jailbreaking your iDevice! 🎉📱🏆🎊
Thank you very much for reading this article and feel free leave a comment. Subscribe and share! If you want to read my first article “Hacking Mobile Apps - easier done than said!”, please click the link!
P.S. Many thanks to Daniel and my wife, Morgan, for editing this article. They helped me deliver quality content. You are awesome!
All the best,
Florian